Wednesday, February 15, 2012

Hobby Update: Astorath the Grim and Death Company Land Raider

So awhile back I decided that I could do a better paint job than the one I had done on Astorath the Grim, so I threw him in the dip and forgot about the project for months. Now that I am building a Death Company army he becomes a bit of a necessity, so out he came. I previously had problems with his axe head breaking off so I converted up a different one with a bit from the Sanguinary Guard kit. I also did a wings swap for the Sanguinor's wings.

Anyway first heres a picture of the old paint job...


I still think I did pretty good on it, but here's the new one...


Yeah, I like that better, especially the axe.

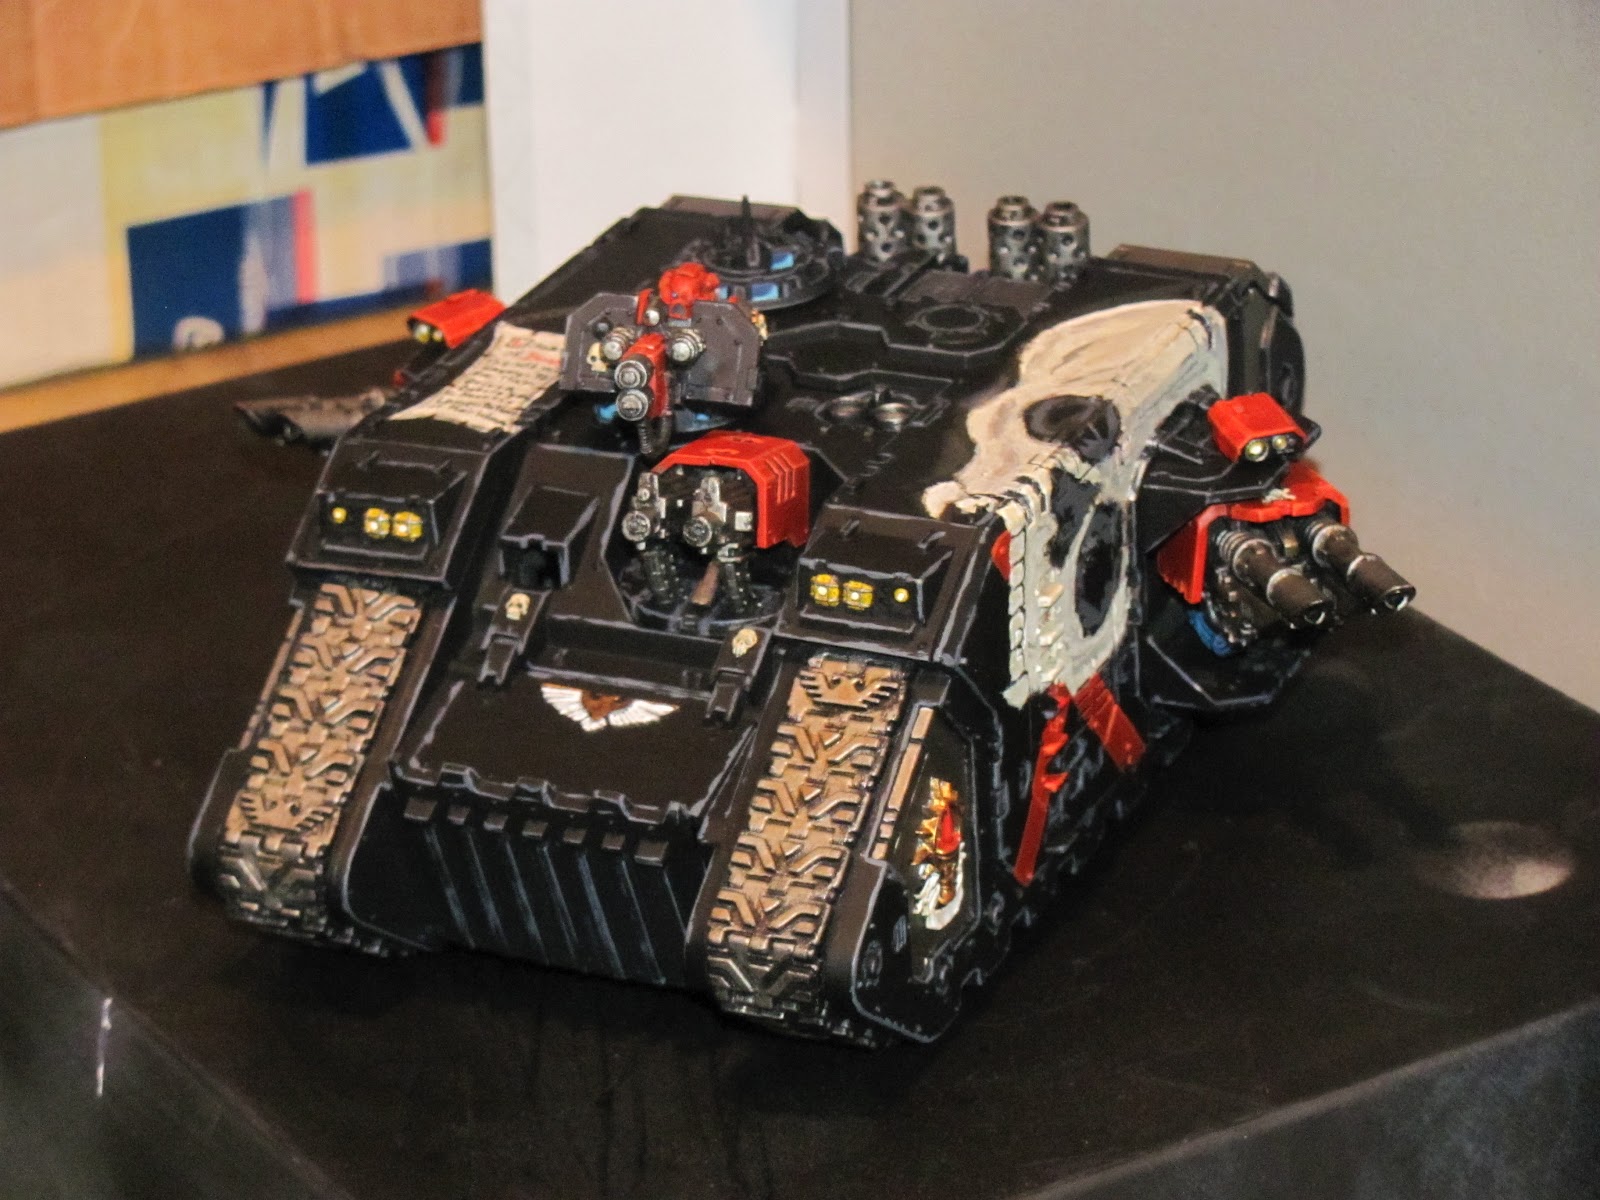
Next up I decided that I wanted a cool ride for my Death Company. I was originally planning on getting a Storm Raven, but after my overtime was cut it just wasn't in the budget anymore. So instead I cannibalized the Land Raider from my Crimson Fists army. I never really used it even when I did play the fists and never finished the paint job on it. Now I don't generally consider myself to be overly artistic and am pretty proud when I manage to freehand a blood drop or some such without screwing it up. So I have no idea what possessed my to try my hand at something as ambitious as the skull on this thing, but I think it turned out pretty damn good!


The scroll here is almost legible and actually says "Liturgies of Blood. To crush your enemy, to see them driven before you, and to hear the lamentation of their women." Sound familiar?

So with the LR done I only have two powerfist guys and one power sword guy to go (being primed as I type this!) and I'll have the army complete up to 1500pts.

Saturday, February 11, 2012

Embracing the Black Rage part II


"Treat them with honour,  my Brothers.
Not because they will bring us victory this day,
but because their fate will one day be ours."
                         Astorath the Grim, Blood Angels High Chaplain


So in this post I want to go into a bit more detail on the Rage USR, its limitations, and what wiggle room it allows us. So first we should probably begin by looking at the rule itself.

Rage: blah, fluff, blah. IN the Movement phase, unit subject to rage must always move as fast as possible towards the closest visible enemy. In the Shooting phase, they are free to decide whether to run, but if they do they must run towards the closest visible enemy. In the Assault phase they must always consolidate towards the closest visible enemy. Whilst falling back, embarked on a transport, or if no enemy is visible, they ignore this rule.

So lets look at the first part of that, where we have to move as fast as possible towards the nearest visible enemy in the Movement phase. There's not a whole lot of wiggle room here, except when you look at the end of the rule. 'if no enemy is visible...' If they can't see the enemy, they won't rage at them.  There is no rule that says you have to move them first. Because of that you can use other units to screen them from seeing the enemy so they can act as normal. This can be done most effectively through the use of vehicles, but with clever placement you can also always use the terrain to your advantage as well. Furthermore, this does provide us with a bit of an opportunity. If there is more than one enemy that is visible we must determine which is closest. In most cases this is pretty obvious, but sometimes it's just too close to call with the naked eye. In that case we have no choice but to pull out the good ol' tape measure. When forced to do so, we  actually have a chance to basically pre-measure our charge range. Something that is rarely afforded to us. We can use this information to decide if we want to run, shoot or stand pat in our shooting phase, based on whether we will have adequate charge range or not, or if the removal of key models could take us out.

Alternately you can always use other vehicles and even infantry to 'funnel' them where you want them to go. If you limit their options or restrict their movement then you gain a bit of control over them as well. Needless to say the number of different scenarios that could come up are limitless, but with some careful thought and movement we can open up some different options.

Next up is the option to run or shoot in the Shooting phase. Now if we choose to run we are beholden to the same rules as in the Movement phase. If we choose to shoot instead, though, we are free to pick any target we desire. There's no restrictions on this. It's one place where we are afforded some free will. Don't be afraid to exercise it!

Finally, we have the Assault phase, where we must consolidate towards the nearest visible enemy unit. It does not place any restrictions on who we can charge though (unless we shot in the shooting phase, of course.) So if you have multiple enemies in charge range you can take your pick of the litter. Or we can multi-assault if we choose, so long as we follow all the normal restrictions of course.

It is still a pretty limiting rule, but when you break it down there is a bit more wiggle room than there first appears to be. It's this wiggle room that you must keep in mind when fielding a unit (or army) of Death Company. Transports are great because once inside the DC can go anywhere they want. Screening them from LOS is another viable tactic, though harder to pull off. Of course my favorite way to use them is Drop Pod insertion, but I already covered that pretty well in the last post ;)


Tuesday, February 7, 2012

Embracing the Black Rage part I

"Treat them with honour,  my Brothers.
Not because they will bring us victory this day,
but because their fate will one day be ours."
                         Astorath the Grim, Blood Angels High Chaplain


more after the jump...

Monday, January 23, 2012

After Action Report: Tournament at Gamers Sanctuary

I attended a 1850pt tournament this weekend at Gamers Sanctuary in Flint. This was the first time I had ever been to their location (being that it's nearly a two hour drive for me to get there!) and found it to be a great store. They have lots of tables and space to play and tons of support for many different gaming systems.

The tournament itself turned out to be a bit on the small side with only six players, but we played on and had a great time anyway! Something I found really surprising was the diversity of the armies represented. I was one of only two imperial armies in the tournament. The other was a Space Wolf army. The other four armies were all Xenos armies. We had two Ork armies, a Tau army and Necrons. Very cool!

more after the jump...

Sunday, January 15, 2012

Video Battle Report: Death Company vs. Space Wolves

This is a battle I had for our clubs escalation league. This one sees my Death Company pitted against Reese's Space Wolves. We are playing 500pts here.
The mission is Annihilation with Pitched Battle Deployment. Reese won the roll off and took 1st turn.


Saturday, January 14, 2012

The Death Company


So I was originally thinking about using the escalation league as motivation to build up and paint my Dark Eldar army. Instead, it seems I am having more fun running (and painting) my Death Company. It is actually an army I have wanted to do for some time now and have decided to use the league as the motivation to finally getting around to it. With that in mind I came up with this list.

Sunday, January 8, 2012

Escalation League Pics

So the Battle Barn is teaming up with Alpha Omega Coffee and Games to run an Escalation League to kick off the new year. We are starting out at 500pts and will be building by 250pts every two weeks. The league is scheduled to run into March where it will culminate in a 1500pt tournament.

So Friday at the Barn was the first night of the league and I had my camera along to snap a few pics of the armies in attendance. So without further ado...